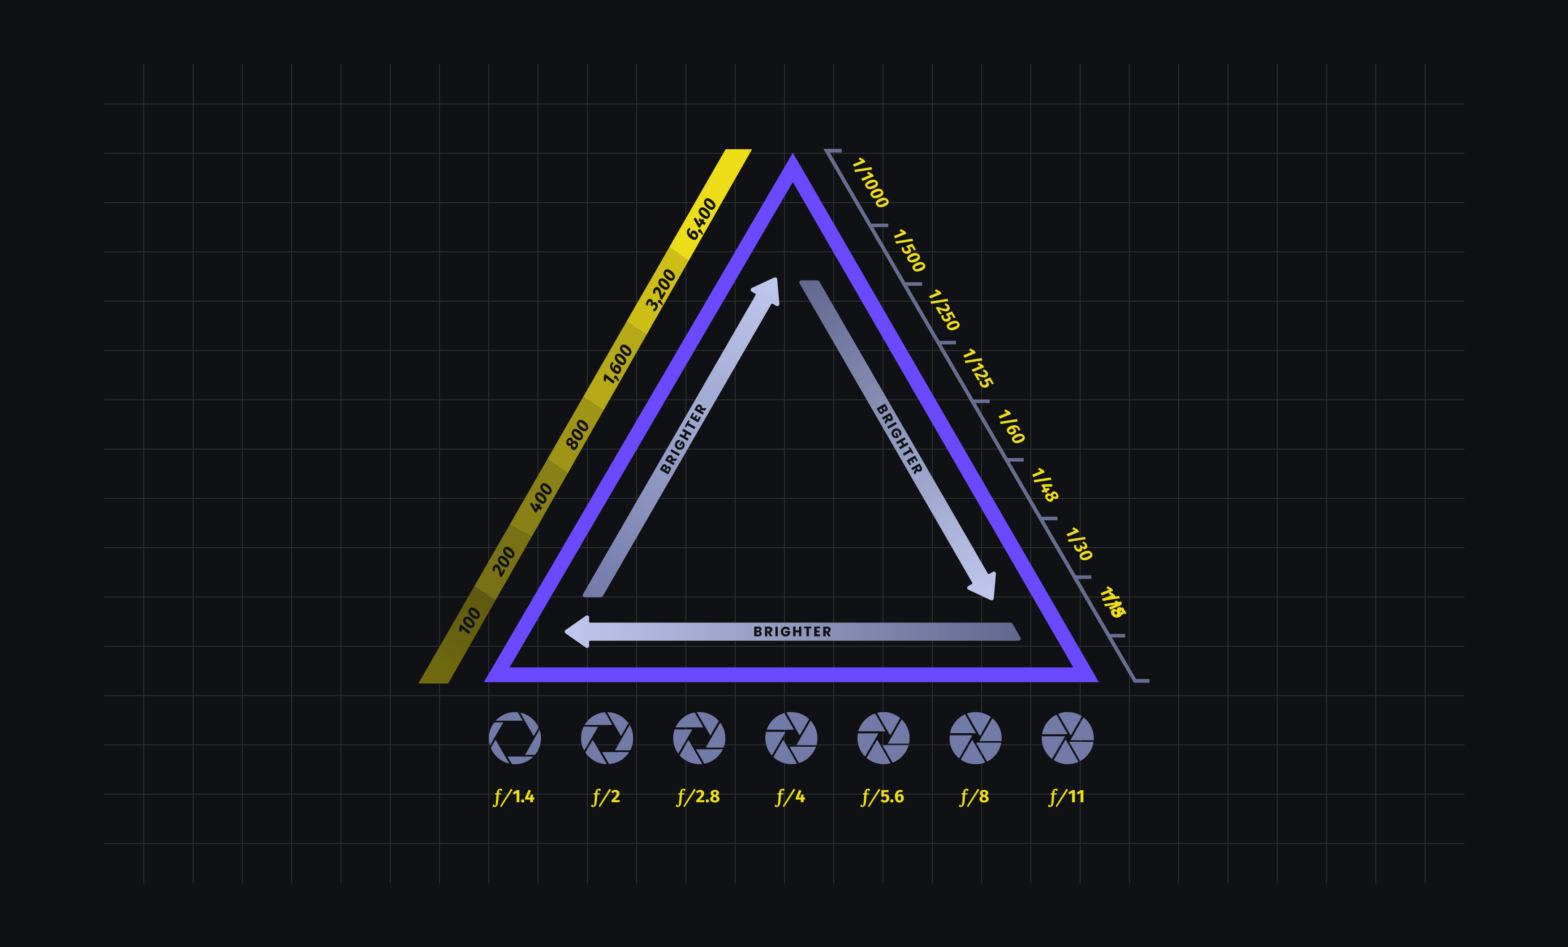
ight is responsible for every image captured in both photography and cinematography. How a camera captures light is determined by three variables that make up what is known as the exposure triangle. What is the exposure triangle? How can each one of its three settings be used to capture an image? In this article, we’ll dive in deep into the three variables that create the exposure of an image. We’ll also take a look at an exposure triangle chart that you can save as a reference to create the images you envision. Let’s dive in.
WHAT IS THE EXPOSURE TRIANGLE?
First, let’s define exposure triangle
Although the exposure photography triangle is one term, it is composed of three different elements. To learn to use the exposure triangle, you must understand how each variable works. Without further ado, let’s define exposure triangle.
EXPOSURE TRIANGLE DEFINITION
What is the exposure triangle?
The exposure triangle consists of three variables that adjust how a camera captures light: aperture, shutter speed, and ISO. Together, these three elements properly expose a shot. The three variables of the exposure triangle are all dependent on each other. For example, adjusting one of the three variables will entail an adjustment of another to maintain proper exposure. The exposure triangle is also referred to as the photography triangle and camera triangle.
Aperture, shutter speed, and ISO are the primary variables of the camera triangle that control exposure. However, each variable also affects other qualities of an image. Depth of field, motion blur, and noise are all determined by elements of exposure triangle photography.
What is the exposure triangle composed of?
- ISO
- Aperture
- Shutter Speed
We’re about to discuss the Exposure Triangle in more concrete terms but, in the meantime, download your copy of our Ultimate Guide to Exposure — a FREE E-book that covers everything you need to know.
FREE DOWNLOADABLE BONUS
FREE Download
Ultimate Guide to Exposure
The Exposure Triangle is something every photographer and cinematographer needs to master. Download our FREE e-book to get in-depth explanations and tutorials on topics like aperture, ISO, shutter speed, and how to balance these settings to nail perfect exposure every time.
PHOTOGRAPHY TRIANGLE EXPLAINED
Aperture
How does the exposure triangle work? To better understand the exposure triangle, let’s examine each variable one by one starting with aperture. The literal definition of aperture means “opening” or “hole.” The aperture of a camera lens is a hole that regulates how much light passes through to the film or sensor.
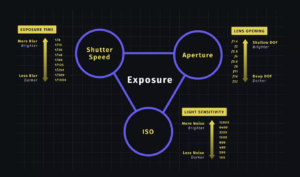
When the shutter button of a camera is hit, the aperture opens up to a predetermined width and lets in a specific amount of light. Aperture works with ISO and shutter speed to control exposure. Here is an image of an exposure triangle cheat sheet that you can save for reference when shooting your next project.
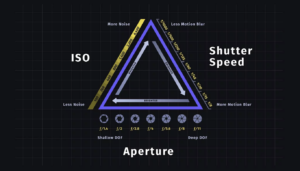
What is the Exposure Triangle Chart?
As you can see from the exposure triangle chart, the width of a camera lens’ aperture is measured in f/stops written in numbers like 1.4, 2, 2.8, 4, 5.6, 8, 11 and 16.
Smaller apertures, like f/16, let in less light. Larger apertures like f/1.4 let in more light. To better understand aperture, take a look at our in depth video breakdown of aperture. Note the visual differences in aperture sizes and how it adds to the overall visual storytelling.
What is Aperture & the Exposure Triangle Explained • Subscribe on YouTube
As you can see from the video, aperture not only affects exposure, but depth of field as well. Small apertures like f/16 create a deep depth of field, allowing more to be in focus. Larger apertures like f/1.4 create a shallow depth of field allowing for a blurred background.
While aperture is an incredibly important variable in exposure triangle photography, it heavily depends on our next variable — shutter speed.
RELATED POSTS
EXPOSURE TRIANGLE EXPLAINED
Shutter Speed
When the shutter button of a camera is pressed, the aperture opens up. How long the aperture stays open is determined by the camera’s shutter speed. Shutter speed controls how long the sensor of the camera is exposed to light.
Shutter speed is measured in fractions of a second. For example, a shutter speed of 1/60 holds the shutter open for one sixtieth of one second. The longer the shutter speed is in time the more light is let in. If it is shorter in time, less light is let in. Here is a video by Phlearn that breaks down shutter speed and how it affects exposure.
What is the exposure triangle? Shutter Speed Guide • Subscribe on YouTube
Like all the other elements of the exposure triangle, shutter speed does not only affect exposure, but other visual elements as well. For shutter speed, motion blur is affected. When shooting with limited light, you may think it would be a good idea to adjust your shutter speed to let in light longer. So, you set it at a 1/20.
The downside of a longer shutter speed like 1/20, is that motion blur becomes much more prominent when you are either capturing a moving subject or the camera itself is moving.
The Exposure Triangle Photography • Shutter Speed
On the opposite end of shutter speeds, fast shutter speeds like 1/1000, will be crisp, but it will also let in less light making it not very ideal for darker shots. This effect also applies when shooting video.
Fast shutter speeds like 1/1000 will capture crisp shots that can look jolty and unnatural to the human eye. Slower shutter speeds will produce motion blur and more out of focus images.
When it comes to cinematography and shutter speed, shutter angles and the 180 degree rule will help you achieve a cinematic look. What are shutter angles?
Shutter angles provide a way to describe the relationship between frame rate and shutter speed. It uses the concept of rotary shutters to illustrate how light passes through an angled opening once per revolution. Larger angles equal more light passing through. This translates to slower shutters dn more motion blur.
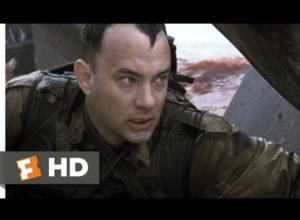
Take a look at this example from Saving Private Ryan that utilizes a slower shutter speed for choppier, jittery shots.
Shutter Speed in the Camera Triangle • Saving Private Ryan
Although modern digital cameras’ shutter speeds do not use a rotary shutter, shutter angles are still a primary means of describing motion blur in an image and how it correlates to frame rate. The most important concept to remember about shutter angles is the 180 degree shutter rule.
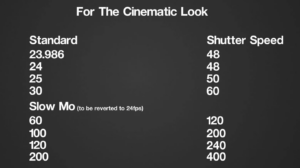
The rule simply means that to achieve a natural amount of motion blur in your shot, simply double the frame rate you are shooting at to find your shutter speed. This is also known as a cinematic shutter speed.
Shutter Angles vs Shutter Speed
A cinematic shutter speed captures motion in a way that is most natural to the human eye. For example, if you are shooting at a frame rate of 30 fps, the cinematic shutter speed to shoot at would be 1/60.
Once light passes through the aperture for a specific amount of time determined by the shutter speed, it finally lands on the camera’s sensor in a digital camera. The sensitivity of the camera’s sensor to light is determined by our next variable — ISO.
THE EXPOSURE TRIANGLE PHOTOGRAPHY
ISO
ISO determines how sensitive a digital camera’s sensor reads the light. In a film camera, ISO refers to a specific film stock’s sensitivity to light. With new technology in DSLR cameras, a camera’s sensor can adjust their ISO and sensitivity to light depending on the available light of a shot.
ISO is measured in ISO values such as 50, 100, 200, 400, 800, 1600, 3200, etc. A lower ISO value such as 50 makes a camera’s sensor less sensitive to light. A higher ISO value such as 1600 makes a camera’s sensor more sensitive to light. This video tutorial breaks down the correlation between ISO values and exposure.
What is ISO? ISO in photography triangle exposure
ISO might sound like it is too good to be true when shooting with limited light. And that is because it is too good to be true. Increasing your ISO to brighten up your shot does come at a cost. That cost is image noise.
Image noise is random variation in color information within an image. Noise causes textural and visual changes in a shot that, when present in large amounts, can appear low quality and unprofessional.
Within filmmaking, however, some cinematographers have experimented with low amounts of image noise to imitate the effect of film grain which can add texture and energy to a shot. This video essay dives into how film grain and noise can be an artistic decision to create a unique visual look.
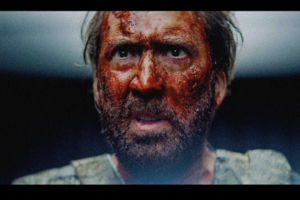
Mandy: The Art Of Film Grain
Now that you understand each element of the exposure triangle, you might be wondering “What is the exposure triangle used for?” The quick answer is that it’s used to properly expose an image. That said, how you properly expose an image will vary depending on the situation you are shooting in. Let’s dive into a few common scenarios that will help you understand how to balance the three variables to capture a great shot.
RELATED POSTS
EXPOSURE TRIANGLE EXPLAINED
Exposing with too much light
There are pros and cons when shooting in an environment with a lot of light, such as an midday exterior shot. The benefit would be that you can shoot at your camera’s low native ISO allowing for minimal image noise and a full dynamic range.
However to avoid overexposure in your shot, you’ll need to adjust either your aperture, shutter speed, or both. If you are shooting a still photo, you may want to begin with shooting at a faster shutter speed to cut down the amount of light coming into the camera.
This will allow you to control the light without compromising your desired aperture and depth of field. For more tips on shooting in bright settings, check out the tips in this video by B&H Photo.
How to Take Portraits in Harsh Sunlight • 5 Quick Tips
If your image is still overexposed, start closing down your aperture to something larger like f/16. While this will affect your depth of field, it will help to properly expose your shot.
If you are shooting video in a bright setting, you won’t have the luxury of adjusting your shutter speed. Let’s take a look at this scene from No Country for Old Men. The scene is an exterior location with harsh, midday desert sunlight
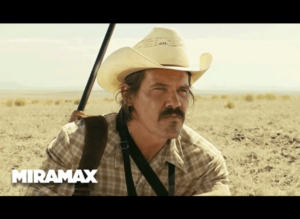
No Country for Old Men • ‘The Discovery’
Let’s take a look at what the different variables of the exposure triangle might have been set to in this scene.
Shutter Speed
To maintain a cinematic shutter speed when shooting at 24 fps, the shutter speed would be set at 1/48th of a second.
Aperture
The aperture of this scene would need to be as small as possible to cut down the amount of light let in. The depth of field is also deep. Shooting at about an f/16.
ISO
To determine the ISO of this brightly lit shot, we would look at what the native ISO of the camera is. No Country for Old Men was shot on an ARRICAM Lite with a native ISO of 500. Depending on if the shot is still overexposed, the ISO would be set at 500 or less.
Bonus
If the shot is still overexposed given the harsh sunlight, an ND filter would also be utilized to cut down light without adjusting the aperture. This will allow you to shoot at a wider aperture without overexposing.
PHOTOGRAPHY TRIANGLE EXPOSURE
Exposing with limited light
On the other side of the lighting spectrum, is shooting with a limited amount of light. This could be the case when shooting at night, within closed interior locations, or shooting without much lighting equipment.
To avoid an underexposed shot, you’ll need to find a balance of all three light exposure variables that properly expose your shot while also achieving the visual look you desire. This exposure triangle diagram is a great reference to use when determining what settings will allow more light in and what side effects it would entail.
Let’s take a look at an example of a low light shot from the film 1917. In this scene, the only source of light is coming from the flashlight practicals. Finding a balance within the photography triangle exposure will help properly expose the shot while maintaining the image’s quality.
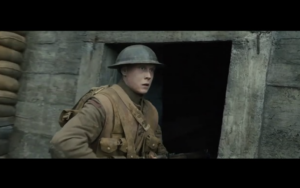
1917 • Photography triangle exposure exercise
Shutter Speed
Again, since this is a cinematic feature film a cinematic shutter speed is needed. To maintain a cinematic shutter speed when shooting at 24 fps, the shutter speed would be set at 1/48th of a second.
Aperture
To let in the most amount of light possible, the aperture should be as wide as possible. But in an interview, cinematographer Roger Deakins said he wanted a bit more depth. To let in as much light as possible with a bit of depth, the aperture would be set at an f/2.8.
ISO
1917 was shot on an ARRI ALEXA Mini LF. Deakins also said that with this camera he could set the ISO to 1600 without the risk of noise. This helped Deakins properly expose the scene while maintaining the quality of the shots.
For more on how Deakins shot 1917, here’s the man explaining the process, including the challenges and solutions they came up with.
How Deakins Shot 1917 • Subscribe on YouTube
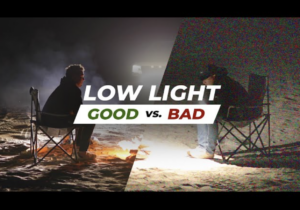
How to Film in Low Light by Parker Walbeck • Exposure triangle explained
Finding a balance between all three in a low light setting will depend heavily on what you want to capture. For example, if you want to shoot a video with a shallow depth of field, opening up to a f/1.4 may be enough to properly expose your shot. But if you want a deep depth of field by shooting at an f/5.6, you may need to increase your ISO.
RELATED POSTS
THE EXPOSURE TRIANGLE PHOTOGRAPHY
Exposing for movement
The exposure photography triangle’s primary function is to properly expose an image. But what is the exposure triangle good for when it comes to capturing movement? Different variables of the exposure triangle can impact how motion appears in a shot.
When capturing images with quick, fast movements a higher shutter speed is typically better. In still life photography, capturing a bird flying in the sky will appear too blurry with a slower shutter speed. A faster shutter speed of around 1/500th of a second to 1/1000, will be able to capture the bird mid-action with full clarity and sharpness.
To better understand how shutter speed affects motion blur and sharpness, check out this video tutorial.
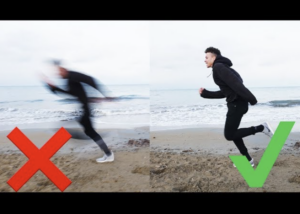
Shutter speed within photography triangle exposure
When shooting video, fast moving action would also benefit from a fast shutter speed. Sporting events, action scenes, or a live concert entail quick movements. If captured with a slow shutter speed, these movements can appear blurry or even out of focus.
Take a look at this scene from John Wick 3. The fight scene is not blurry, but crispy and clear, most likely due to a fast shutter speed.
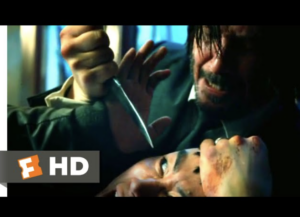
John Wick: Chapter 3 – Parabellum
Shutter Speed
Although you should follow the 180 degree shutter rule, there are times to bend it. Shooting an action scene is one of them. Cranking up you shutter speed in this scene to about 1/125th of a second makes movements more crisp and intense with minimal motion blur.
Aperture
Since the shutter speed is increased, the amount of light let in is decreased. To balance this out and properly expose the shot, the aperture would open up to about an f/2.8 to let in light but maintain some depth of field.
ISO
The ISO setting will depend on the native ISO of the camera. However, there is a decent amount of light in the shot and the ISO will probably not need to be increased from around an ISO 500.
Keep in mind that a faster shutter speed will entail an adjustment of another exposure variable to let in more light. It also will break your cinematic shutter speed so be mindful of this adjustment and decide whether it is needed.
Mastering the exposure triangle is a fundamental skill necessary for every photographer and cinematographer. While it may seem incredibly technical, it is what allows the best cinematographers and photographers to capture the creative images that they envision.
Reading and understanding the different variables of the exposure triangle is just part of the battle of mastering exposure. The second part is getting out and experimenting with the different functions of your camera. Spending time shooting is just as important as the research you put in. Now get out and get shooting!
